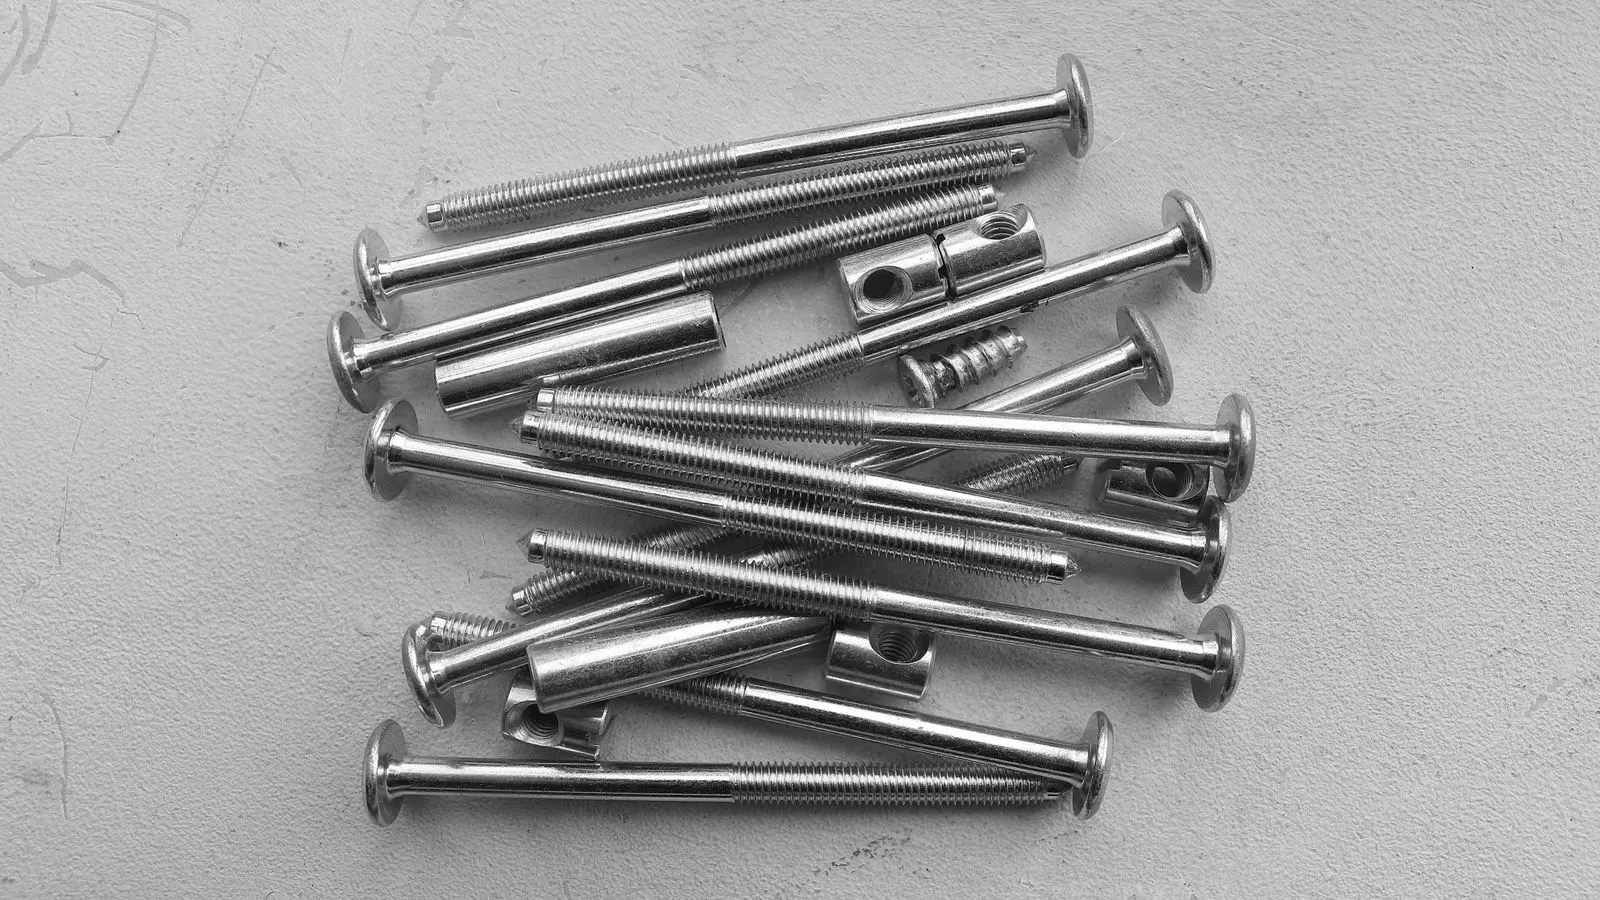
Checklist: Verifying Anchor Bolt Dimensions
Confirm anchor bolt dimensions match drawings before installation. This checklist covers thread pitch, shank length, head type, and material grade. It helps prevent costly rework and ensures structural integrity.
- Measure thread pitch, shank length, and head diameter against the project drawing.
- Verify material grade with mill test certificates or heat stamp verification.
- Check surface condition for corrosion, burrs, or coating defects.
- Confirm thread engagement depth meets structural connection requirements.
- Document all measurements with photos and written records for traceability.
Why Anchor Bolt Dimension Verification Matters
Anchor bolt dimension verification prevents field failures. A half-millimeter error in thread pitch can cause a stud to strip during installation. A short shank leaves no engagement in the concrete. These small deviations look minor on paper but create major problems on site.
Buyers and engineers receive thousands of fasteners before installation. Without a systematic check, mismatches slip through. The cost of catching a bad batch at the warehouse is fractions of the cost of replacing them after concrete has been poured.
This checklist gives you a repeatable process. Use it at receiving inspection, at the site, or both. Each item targets a specific failure mode common in anchor bolt projects.
Pre-Installation Document Review
Before touching the physical bolts, review the paperwork. The project drawing and the material test certificate form the baseline. If these documents disagree, stop and resolve the discrepancy before receiving the shipment.
Match the following against the purchase order and structural drawings:
- Bolt specification and standard reference
- Nominal diameter and thread type
- Thread pitch (coarse or fine)
- Overall length and threaded length
- Head type and height
- Grade or strength class
- Surface finish and coating specification
A red flag appears when the mill test certificate lists a different heat number than the packing list. Another red flag is a drawing revision that was never reflected in the purchase order. Document these gaps in writing before proceeding.
The thread pitch specification is where most confusion happens. A standard metric thread can be either coarse or fine. A 1/2 inch thread can be UNF or UNC. If the drawing says “standard pitch” without specifying, ask for clarification immediately. Ambiguity here leads to stripped threads during installation.
Thread Measurement Checks
Thread measurement requires the right tools. A thread pitch gauge is the primary instrument. It has multiple blades, each matching a specific pitch. You press the blade into the thread until it sits flush without binding. The blade that fits without resistance is your pitch.
For metric threads, common pitches range from 1.25 mm to 2 mm for diameters up to 20 mm. Larger diameters often use coarser pitches. For inch threads, the standard pattern is different. UNF threads have more turns per inch than UNC threads.
Measure pitch at three points along the threaded length. Thread runout or a worn die can create inconsistent pitch near the tip or base. If one blade fits at the head but a coarser blade fits at the tip, the thread is out of spec.
Check the thread form. The V-shape should be clean and consistent. Look for:
- Burrs or sharp edges at the thread tip
- Cross-threading marks from handling
- Gaps between adjacent thread flanks
- Uneven thread depth
A red flag is visible galling or metal transfer on the thread surface. This suggests the bolt was stored with incompatible fasteners or was damaged during transport.
Shank and Head Dimension Checks
Shank length determines how far the bolt embeds into the concrete. Measure the unthreaded portion with a digital caliper. Compare to the drawing tolerance. A typical tolerance might be plus or minus 0.5 mm, but always check the project specification.
The threaded length is equally critical. It determines the engagement in the anchor base or sleeve. Measure from the head face to the tip of the thread. If the threaded length is short, the connection may not achieve the designed pullout capacity.
Head dimensions affect installation and shear capacity. Measure:
- Head diameter
- Head height
- Hex width across flats (for hex bolts)
- Hole diameter (for through bolts)
For foundation bolts that sit in epoxy sleeves, the head must not interfere with the sleeve opening. A head that is 1 mm too large can prevent proper seating.
A red flag is a head that sits unevenly on the base plate. This indicates a bent shank or an off-center head. Even if the shank is straight, a distorted head can cause stress concentrations at the thread root.
Material Grade and Coating Verification
Grade verification protects structural integrity. For high-strength anchor bolts, confirm the grade with the mill test certificate. For heat-stamped bolts, match the stamp to the grade specification. If the bolt is not stamped, require the certificate to be the only acceptance basis.
Common grades for structural anchor bolts include medium-strength carbon steel and higher-strength grades. The difference in yield and ultimate tensile strength is significant. Using a lower-grade bolt in a high-load application compromises the entire connection.
Check the coating condition. Zinc plating, hot-dip galvanizing, and other finishes protect against corrosion but add thickness. This thickness affects dimensional tolerances. A heavily coated bolt may exceed the maximum head width specified in the drawing.
Inspect the coating for:
- Drips or runs that create sharp edges
- Thin spots at the thread tip
- Bubbles or porosity
- Discoloration suggesting heat damage
A red flag is coating that has migrated into the threads. This reduces effective thread diameter and can cause the bolt to be difficult to thread into the anchor base. If the coating is too thick in the threads, the bolt may not reach the required depth.
Installation Readiness and Field Checks
The final step is field verification before the bolt is set in the formwork or epoxy sleeve. This is where drawing dimensions meet real-world conditions.
Perform these checks:
- Verify the embedment depth matches the concrete formwork dimension.
- Confirm the bolt head sits flush with the formwork face or at the specified offset.
- Check that the bolt is perpendicular to the base surface.
- Measure the distance between adjacent bolts if multiple are in a group.
- Confirm the thread direction matches the installation tooling.
Use a string line or laser level to check alignment. A bolt that is off by 5 degrees from vertical can create eccentric loading. For critical applications, use a plumb bob or digital level.
A red flag is a bolt that is difficult to rotate during test installation. This suggests the thread is not matching the anchor base. If you cannot rotate the bolt freely, stop and inspect both the bolt and the base. Forcing a mismatched thread destroys the connection.
Documentation and Traceability
Record every measurement. A written log with photos creates an audit trail. If a failure occurs years later, you need to know what was installed and how it was verified.
Your documentation should include:
- Date and time of inspection
- Lot number or heat number
- Measured values for each critical dimension
- Pass or fail status for each item
- Inspector name and signature
- Photos of thread pitch, head, and shank
Store the records with the project files. Many contracts require as-built records to be submitted after installation. Having the verification data ready simplifies this process.
A red flag is missing documentation. If you cannot prove that the bolts matched the drawing at receipt, you lose use with the supplier. If you cannot prove they matched the drawing at installation, you lose use with the contractor.
Common Failure Modes to Watch For
| Failure Mode | Root Cause | Detection Method |
|---|---|---|
| Stripped threads | Wrong thread pitch or forced installation | Thread pitch gauge check, rotation test |
| Insufficient engagement | Short threaded length or incorrect embedment | Caliper measurement, depth gauge |
| Head interference | Coating too thick or wrong head type | Caliper measurement, visual check |
| Bent shank | Handling damage or improper storage | Straightedge test, visual inspection |
| Wrong grade | Supplier substitution or mislabeling | Mill test certificate, heat stamp check |
Each failure has a specific detection method. The table above maps the problem to the check that catches it. Use this as a quick reference when reviewing your inspection results.
The most common failure in practice is thread pitch mismatch. It happens when a supplier substitutes a fine thread for a coarse thread without changing the drawing. The diameter is the same, but the thread form is not. The bolt may appear correct on a visual inspection but will not thread properly into the anchor base.
The second most common failure is insufficient threaded length. This often occurs when the supplier shortens the bolt to reduce cost. The overall length may be correct, but the threaded portion is too short. The connection pulls out before the bolt yields.
Final Verification Protocol
Before concrete is poured, perform a final walk-through. Bring the drawing, the measurement tools, and the verification log. Check at least five bolts from different locations in the batch.
Confirm the following:
- Thread pitch matches the specification at every checked bolt
- Threaded length provides adequate engagement
- Head dimensions allow proper seating in the sleeve
- Bolts are vertical and at the correct spacing
- No visible damage, corrosion, or coating defects
If any check fails, quarantine the affected lot. Do not install. Notify the supplier and request a replacement or correction. Document the rejection in writing.
Anchor bolt dimension verification is not a one-time event. It is a discipline. The bolts that pass receiving inspection may still have issues after handling and storage. Re-check at each major milestone. The cost of verification is small. The cost of failure is not.
Frequently asked questions
How do I measure thread pitch on an anchor bolt?
Use a thread pitch gauge. Press each blade into the thread until it sits flush without binding. The blade that fits is your pitch. Measure at three points along the thread length to check for consistency.
What is the difference between threaded length and overall length?
Overall length is from head face to tip. Threaded length is from head face to the end of the thread. Threaded length determines engagement in the anchor base. Overall length determines embedment depth.
Can I verify grade without a mill test certificate?
You can check heat stamps on the bolt, but this is less reliable than documentation. For high-strength applications, require the certificate. For lower-strength applications, a visual check may be acceptable if the supplier is trusted.
What tolerance should I expect for shank length?
Tolerances vary by project. Common tolerances are plus or minus 0.5 mm for standard applications. Always check the project drawing for the specified tolerance. Do not assume.
What should I do if the coating is too thick in the threads?
Reject the bolt. Coating in the threads reduces effective diameter and prevents proper engagement. Request a replacement or a coating removal process if the supplier agrees.